Discover the art of enhancing your natural features with contouring and highlighting. Learn how to create defined cheekbones, slim your face, and achieve a polished glow effortlessly.
1.1 What is Contouring and Highlighting?
Contouring involves using darker shades to create shadows, defining facial features like cheekbones and jawlines. Highlighting uses lighter tones to brighten areas, such as the nose and cupid’s bow. Together, they enhance natural beauty, creating depth and dimension for a polished look. These techniques help slim or lift facial structures, offering a tailored, radiant appearance. Proper application blends seamlessly, making it nearly invisible while transforming your face shape and complexion. It’s a versatile makeup method for everyday or special occasions.
1.2 Importance of Contouring and Highlighting in Makeup
Contouring and highlighting are essential techniques that enhance facial features, creating depth and dimension. They balance proportions, slim or lift areas, and brighten key spots for a radiant appearance. These methods allow customization to suit various face shapes and skin tones, boosting confidence. By defining and illuminating strategic areas, they create a polished, professional look perfect for both everyday wear and special occasions, making them indispensable in modern makeup routines for achieving a flawless, sculpted face.
Understanding the Basics
Mastering contouring and highlighting begins with the right tools and skin prep. Use quality brushes and products, and ensure your skin is primed for seamless application and blending.
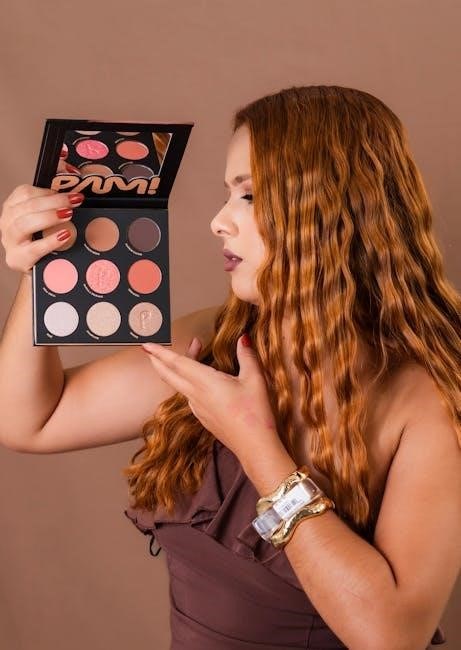
2.1 Essential Tools and Products Needed
To master contouring and highlighting, you’ll need the right tools and products. Start with a contour brush or makeup sponge for precise application. Use a lighter shade for highlighting and a darker shade for contouring, ensuring they complement your skin tone. Invest in a good translucent powder for blending and a concealer for added structure. Don’t forget a blush to enhance your natural glow. Quality products and tools are key to achieving a seamless, professional finish.
2.2 Preparing Your Skin for Contouring and Highlighting
Start with a clean, moisturized face to ensure a smooth canvas. Apply primer to even out your skin texture and extend makeup wear. Use foundation to match your skin tone, blending well. Conceal dark spots or blemishes for a uniform base. Lightly dust your face with finishing powder to set your base and make blending easier. Proper preparation ensures your contour and highlight look natural and long-lasting, enhancing your features flawlessly.

Choosing the Right Shades
Select contour shades two to three tones darker than your foundation and highlighters one to two tones lighter. Match your skin tone and undertones for a natural look.
3.1 Selecting Contour Shades Based on Skin Tone
Choosing the right contour shade depends on your skin tone. For fair skin, opt for light, cool-toned shades to avoid harsh lines. Medium skin tones can use soft brown or taupe shades for a natural look. Deep skin tones look stunning with rich, warm shades like deep bronzes or chocolates. Always match your contour shade to your undertones—cool for pink undertones and warm for yellow or golden tones. This ensures a seamless, natural-looking finish that enhances your features without appearing artificial.
3.2 Picking Highlighter Shades for Different Skin Types
Highlighter shades should complement your skin type and tone. For fair skin, opt for soft pinks or champagnes. Medium skin tones can wear golds or peaches. Deep skin looks stunning with bronzes or coppers. Cool undertones suit pink or lavender highlights, while warm undertones glow with golden or peach shades. Always test on your jawline to ensure a natural match. Apply highlighter to high points like cheekbones, brow bones, or the nose for a radiant, lit-from-within glow that enhances your natural beauty.
Contouring and Highlighting Techniques
Master blending techniques and tools to create a natural, sculpted look. Layer products for depth and dimension, ensuring a seamless finish that enhances your features beautifully.
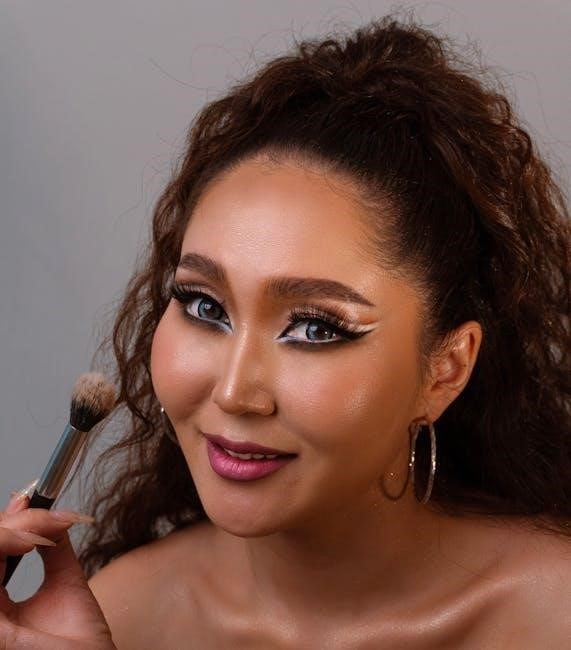
4.1 Step-by-Step Guide for Beginners
Start by prepping your skin with a light coat of finishing powder for smooth blending. Apply contour under the cheekbones, jawline, and temples using a brush or sponge. Blend thoroughly with a fluffy brush or beauty blender. Highlight high points like the cupid’s bow, brow bone, and nose tip with a lighter shade. Layer concealer for added structure and finish with translucent powder to set everything. This creates a natural, defined look perfect for everyday wear.
4.2 Advanced Tips for a Sculpted Look
For a refined, sculpted appearance, layer concealer as a structuring highlighter first, then apply powder contour. Blend with translucent HD powder for seamless results. Add blush to the apples of your cheeks for a natural glow. Experiment with carving angles to define facial features and use subtle layering to enhance dimension. Highlight high points like the nose tip and cupid’s bow with lighter shades for a radiant finish. Taper contour and highlight toward the hairline and jawline for a cohesive look. Set everything with setting spray for longevity.
Face Shape-Specific Contouring
Master contouring techniques tailored to your face shape. Learn how to enhance round, oval, heart, and square faces with expert-approved tips for a natural, defined look.
5.1 Contouring for Round Faces
For round faces, contouring focuses on creating length and definition. Apply contour shades below the cheekbones, starting from the ear to the mouth, to slim the face. Use light, angular strokes along the temples and jawline to create a more oval appearance. Highlight the forehead, chin, and nose to draw attention upward. This technique balances roundness by creating illusions of length and structure, enhancing your natural beauty with subtle, precise application.
5;2 Contouring for Oval, Heart, and Square Faces
Oval faces require minimal contouring to maintain balance. Apply subtle contour below the cheekbones and along the jawline for definition. Heart-shaped faces benefit from contouring the temples and jawline to reduce width. For square faces, soften angular features by contouring the jawline and temples gently. Highlight the forehead, nose, and chin for all shapes to enhance natural beauty. These techniques create harmony, balancing each face shape uniquely while maintaining a natural, polished look.
Blending Techniques
Master seamless blending by dusting a light coat of finishing powder first. This ensures contour and highlight merge naturally, creating a smooth, polished finish for all skin tones.
6.1 How to Blend Contour and Highlight Seamlessly
The key to seamless blending is starting with a light coat of finishing powder. Layer concealer as a structuring highlighter first, followed by powder contour. Use a brush or sponge to blend upward and outward, ensuring natural transitions. Avoid harsh lines by feathering edges softly. Translucent HD powder can refine the finish, creating a polished, natural look. Proper blending enhances definition without appearing artificial, allowing your features to stand out effortlessly.
6.2 Using Translucent Powder for a Natural Finish
Translucent powder is essential for setting your contour and highlight, ensuring a natural finish. Apply it lightly over your base to prevent cakeiness. Use a fluffy brush to dust it across blended areas, focusing on T-zones for oil control. This step enhances staying power and softens harsh lines. For a polished look, buff gently with a powder puff. It creates a seamless finish, making your contour and highlight appear effortless and professional.

Adding Dimension with Concealer and Blush
Layer concealer to add structure and define features, then apply blush to the apples of your cheeks for a natural glow, enhancing dimension and radiance effortlessly.
7.1 Layering Concealer for Structure
Layering concealer adds definition and structure to your face. Apply a thin layer under the eyes and around the nose to brighten and create a smooth base. Blend gently toward the hairline for a natural look. Use light, buildable layers to avoid cakeiness. Start with a concealer one shade lighter than your foundation to highlight key areas, then blend outward for a seamless finish. This technique enhances facial contours and prepares the skin for contour and blush application.
7.2 Applying Blush for a Natural Glow
Apply blush to the apples of your cheeks for a soft, natural radiance. Gently sweep the color upward and outward toward the temples. Choose a shade that complements your skin tone—pinks for fair skin, corals for medium tones, and berry shades for deeper complexions. Lightly blend the edges to avoid harsh lines. This step adds warmth and dimension, creating a healthy, glowing complexion that enhances your contour and highlight work seamlessly.
Common Mistakes to Avoid
Avoid over-contouring, which can look unnatural. Start with light layers and build gradually. Ensure highlighter and contour shades match your skin tone for a seamless finish.
8.1 Over-Contouring and How to Fix It
Over-contouring can make your features appear harsh and unnatural. To fix it, blend excess product with a fluffy brush or beauty blender. Start with light layers and build gradually. Avoid using shades too dark for your skin tone, as this can create stark lines. Instead, opt for soft, natural transitions. Dusting a translucent powder over contoured areas can soften the look. Remember, contouring should enhance, not overpower, your natural features.
8.2 Highlighting Errors and Their Solutions
Common highlighting mistakes include over-highlighting, which can make the face look greasy, and improper placement. To fix, use a light hand and apply highlighter only to high points like the tops of cheekbones, nose, and cupid’s bow. Blend well with a fluffy brush or sponge for a natural glow. Avoid using overly shimmery products if aiming for a subtle look. Choose highlighter shades that complement your skin tone for a seamless finish.
Mastering contouring and highlighting can transform your makeup routine, enhancing your features and boosting confidence. Practice, patience, and the right techniques will help you achieve a flawless, sculpted look tailored to your unique beauty.
9.1 Final Tips for a Flawless Contour and Highlight
For a seamless contour and highlight, blend thoroughly and use light layers. Start with a light coat of finishing powder to ease blending. Choose products that complement your skin tone and type, ensuring contour shades mimic natural shadows. Highlight areas like the high points of your face for a radiant glow. Avoid over-contouring by building up gradually. Set everything with translucent powder for a natural, long-lasting finish. Remember, practice makes perfect, so experiment until you find what works best for you.

0 Comments